Welcome to the ultimate guide on cutting round cakes! Proper cake cutting ensures even portions, preserves aesthetics, and enhances serving efficiency. This guide covers essential techniques, tools, and tips for achieving perfect slices every time.
1.1. Importance of Proper Cake Cutting
Proper cake cutting is essential for ensuring equal portions, maintaining aesthetics, and preventing waste. A neatly sliced cake enhances presentation, making it visually appealing for gatherings or special occasions. Evenly cut slices guarantee everyone enjoys the same quality and flavor, fostering fairness and satisfaction. Moreover, precise cutting prevents the cake from breaking or toppling, which can ruin its appearance. For professional bakers or home cooks, proper techniques showcase skill and attention to detail. Using the right tools, like a serrated knife and cake stand, ensures smooth, clean cuts. This not only preserves the cake’s structure but also makes serving easier and more efficient. Proper cake cutting is a simple yet impactful step in delivering a flawless dessert experience.
1.2. Overview of Round Cake Cutting Techniques
Round cake cutting involves precise techniques to achieve uniform slices and maintain the cake’s integrity. The most common method is the radial slice technique, where cuts are made from the center outward. This ensures even portion sizes and minimizes crumbs. Another technique is the “pinwheel” cut, which involves making parallel slices across the cake’s diameter. For tall cakes, a vertical cut down the middle before slicing helps stabilize the structure. Using tools like a serrated knife and cake stand enhances control and precision. Leveling the cake beforehand is crucial for consistent results. These techniques not only simplify serving but also preserve the cake’s aesthetic appeal, making them essential for both home bakers and professionals.

Essential Tools for Cutting Round Cakes
Essential tools for cutting round cakes include a serrated knife, cake stand, cutting guide, and serving spatula. These tools ensure precision, stability, and clean portion removal.
2.1. Serrated Knife for Smooth Cutting
A serrated knife is indispensable for cutting round cakes smoothly. Its toothed edge ensures clean, even cuts through both the cake and frosting without tearing. The serrations create a sawing motion, which helps maintain control and prevents crumbling. A sharp serrated knife is crucial for achieving professional-looking slices. When choosing a serrated knife, opt for one with long, evenly spaced teeth for the best results. Regular sharpening will ensure the knife remains effective. Using a serrated knife is a fundamental step in achieving perfectly portioned and visually appealing cake slices.
2.2. Cake Stand or Turner for Stability
A cake stand or turner is essential for maintaining stability while cutting round cakes. It elevates the cake, making it easier to access and slice evenly. The stand or turner prevents the cake from wobbling, ensuring smooth, precise cuts. This tool is particularly useful for tall or multi-layered cakes, as it provides a sturdy base and allows for easy rotation. By keeping the cake secure, a stand or turner minimizes the risk of accidents and helps achieve clean, professional-looking slices. Investing in a high-quality cake stand or turner is a must for anyone serious about mastering the art of cake cutting.
2.3. Cutting Guide or Template for Precision
A cutting guide or template is a valuable tool for achieving precision when slicing round cakes. It helps ensure uniform portion sizes and straight, even cuts. Adjustable templates can accommodate various cake diameters and desired slice widths, making them versatile for different occasions. By aligning the guide with the cake’s edge, you can effortlessly create consistent slices without guesswork. This tool is especially useful for novice bakers or those aiming for professional-looking results. It minimizes crumbs and ensures decorations are evenly distributed across each slice. Using a cutting guide saves time and reduces waste, making it an essential accessory for anyone serious about mastering cake cutting techniques.
2.4. Serving Spatula for Portion Removal
A serving spatula is an indispensable tool for removing cake portions cleanly and efficiently. Its thin, flexible blade allows for smooth sliding under each slice, preventing the cake from breaking or crumbling. The curved or angled edge of the spatula helps in lifting and transferring portions to plates without damaging the cake’s structure or decorations. This tool is particularly useful for serving large or multi-layered cakes, as it ensures even and precise portion removal. By using a serving spatula, you maintain the presentation quality of each slice and make serving easier for both hosts and guests; Its durability and ease of cleaning also make it a practical addition to any cake-cutting toolkit.
Preparing the Cake for Cutting
Proper preparation ensures clean, even slices. Begin by cooling the cake completely to set the layers and frosting. Apply a crumb coat to trap loose crumbs, then frost thoroughly. This process prevents messy cuts and enhances presentation. A well-prepared cake makes the cutting process smoother and more efficient, ensuring professional-looking results.
3.1. Cooling the Cake Completely
Cooling the cake is essential for clean, even cutting. Allow the cake to cool on a wire rack at room temperature to prevent sogginess. Avoid refrigeration initially, as it can trap moisture and affect texture. Once the cake is completely cool, it will be firmer and easier to handle, reducing the risk of breaking or crumbling. A cooled cake also ensures that frosting adheres properly and decorations stay intact. Rushing this step can lead to uneven slices and a messy appearance. Patience is key to achieving professional-looking results. Proper cooling is the foundation for precise, clean cuts and a visually appealing final presentation.
3.2. Crumb Coating for Clean Slices
A crumb coat is a thin layer of frosting applied to the cake to trap loose crumbs, ensuring clean, neat slices. To apply, use an offset spatula to spread a small amount of frosting evenly over the cake’s surface. Refrigerate for about 10–15 minutes to set the crumb coat. This step prevents crumbs from mixing into the final layer of frosting, resulting in a smoother appearance. After the crumb coat is set, proceed with the final frosting. This technique is especially useful for cakes with delicate or crumbly textures. A well-executed crumb coat enhances the cake’s visual appeal and makes slicing easier. It’s a simple yet effective step for professional-looking results.
3.3. Final Frosting Application
The final frosting application is the last step before cutting the cake. After the crumb coat has set, apply a generous amount of frosting to the cake, spreading it evenly with an offset spatula or piping bag. For a professional finish, spin the cake stand while smoothing the frosting to ensure an even layer. Use long, sweeping motions to create a smooth surface. For tall or multi-layered cakes, a bench scraper can help achieve sharp edges. Once the frosting is applied, refrigerate the cake for about 10–15 minutes to set. This ensures the frosting holds its shape and prevents smudging when cutting. Decorations or toppings can be added before the frosting sets for a polished look. A well-frosted cake not only looks appealing but also helps in achieving clean, even slices.
Measuring and Portion Control
Measuring and portion control ensure consistent serving sizes and even distribution. Use a serrated knife and cake guide for precise cuts. Tools like cake cutters or templates help achieve uniform slices, while marking the cake with even spacing prevents overcrowding. This method guarantees fair portions and professional presentation, making every slice visually appealing and evenly decorated. Proper portioning also helps in managing leftovers effectively and ensures the cake is enjoyed evenly by all guests.
4.1. Determining Serving Sizes
Determining serving sizes is essential for portion control and ensuring everyone gets an equal share. Start by measuring the cake’s diameter and calculating its area. A standard serving size is typically a slice measuring 1×2 inches. For a round cake, the number of servings depends on its size. For example, an 8-inch cake usually serves 8-10 people, while a 10-inch cake serves 12-15. Use a cake cutting guide or template to mark even spacing for slices. This helps in dividing the cake evenly without overcrowding. By pre-measuring, you can achieve uniform portions and ensure each guest receives a fair share. This step is crucial for both presentation and satisfaction.
4.2. Using a Cake Cutting Guide or Template
A cake cutting guide or template is a valuable tool for achieving precision and consistency. These guides, often made of plastic or cardboard, are placed on top of the cake to mark where to make cuts. They come in various sizes and can be adjusted based on the desired portion size. By aligning the guide with the cake’s center, you can ensure radial cuts are evenly spaced. This method is especially useful for large or multi-layered cakes. Some guides also include measurements for different serving sizes, making portion control effortless. Using a template minimizes waste and ensures every slice looks professional. It’s a simple yet effective way to achieve uniform results.
4.3. Ensuring Even Distribution of Decorations
Ensuring even distribution of decorations is key to a visually appealing cake. Start by placing decorations symmetrically around the cake’s center. For example, if using fresh flowers or sprinkles, divide them evenly and position them at equal intervals. Use a turntable to view the cake from all angles, ensuring no bare spots. For intricate designs, plan the layout beforehand or use a stencil to guide placement. When cutting, consider how decorations will be distributed across slices. This ensures each portion looks as inviting as the whole cake. Even distribution enhances both presentation and the overall dining experience, making every slice feel special.
Leveling the Cake
Leveling ensures the cake sits flat, preventing wobbling. Use a serrated knife or cake leveler on a stable surface. Chilling the cake first helps achieve a clean cut.
5.1. Tools for Leveling a Round Cake
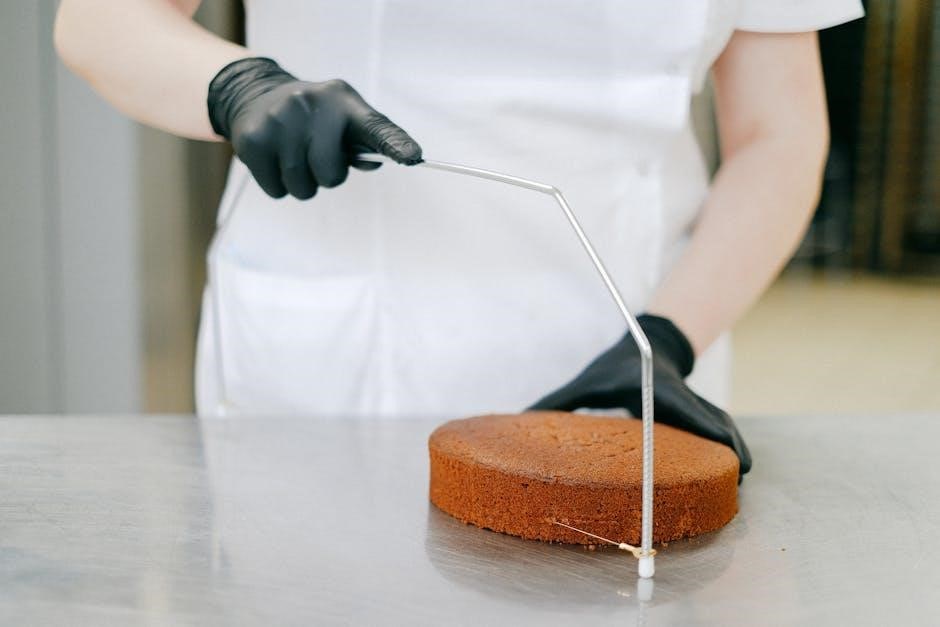
The essential tools for leveling a round cake include a serrated knife, a cake leveler, or a carpenter’s saw. A serrated knife is ideal for precision, while a cake leveler ensures evenness. A turntable can help stabilize the cake during the process. For tall cakes, a long serrated knife or cake saw is recommended. A bench scraper can remove excess cake crumbs after leveling. These tools ensure the cake is perfectly flat, making frosting and serving easier. Proper tools prevent uneven layers and ensure a professional finish. Always use a stable surface and a sharp blade for clean cuts. Leveling tools are indispensable for achieving a polished look in round cakes.
5.2. Why Leveling is Crucial for Even Cutting
Leveling a round cake is essential for achieving even, professional-looking slices. An unleveled cake can result in uneven frosting distribution and uneven portions. This can lead to a lopsided presentation and inconsistent serving sizes. Leveling ensures the cake sits flat, preventing it from tilting or wobbling, which can cause slices to vary in size and appearance. Additionally, a level cake ensures that decorations and frosting are evenly spread, enhancing the overall visual appeal. For multi-layered cakes, leveling is critical to maintain structural integrity. Uneven layers can cause instability, making the cake more prone to collapse. Proper leveling ensures each slice is uniform, providing a fair and polished serving experience for all guests.

Cutting Techniques for Round Cakes
Mastering cutting techniques ensures even, clean slices. Start with a serrated knife, cut radially from the center. For tall cakes, use a cake cutter or long knife for precision and consistency.
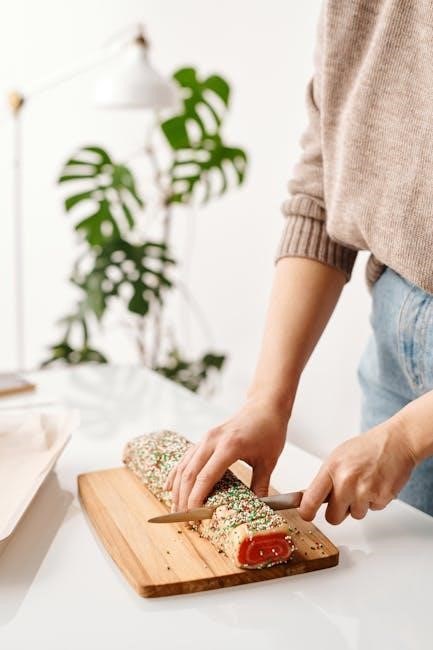
6.1. Making the First Cut
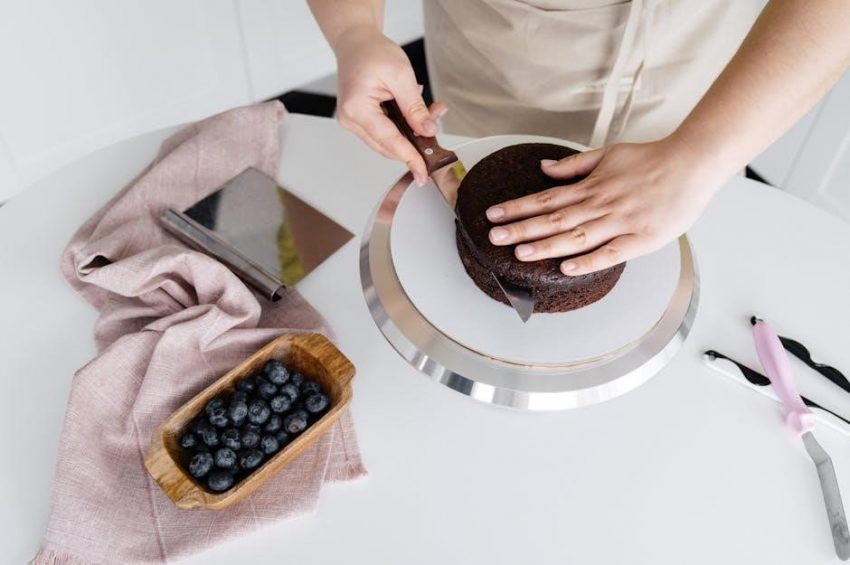
Making the first cut is crucial for achieving clean, even slices. Place the cake on a stable surface or cake stand. Hold a serrated knife at a slight angle, positioning it at the edge of the cake. Gently score the top crust to create a visual guide. Apply light pressure, moving the knife smoothly through the cake in a sawing motion. Start from the top edge and work toward the center. Avoid applying too much pressure, which can crush the cake. Use a gentle back-and-forth motion to maintain control. Once the first cut is made, use it as a reference for subsequent slices. Ensure the cake is completely set to prevent structural issues during slicing.
6.2. Cutting Radial Slices for Even Portions
Cutting radial slices ensures even portions and a professional presentation. Start by aligning the knife with the center of the cake. Gently press the blade downward, using a smooth, sawing motion to create the first radial slice. Rotate the cake stand slightly after each cut to maintain even spacing. Apply consistent pressure to avoid uneven thickness. For precision, use a cake cutting guide or mark the cake with evenly spaced notches before slicing. This method guarantees uniform portions and prevents waste. After each slice, use a serving spatula to carefully lift and transfer the portion to a plate. This technique works well for both single and multi-layered cakes, ensuring a clean and visually appealing result every time.
6.3. Handling Tall or Multi-Layered Cakes
Handling tall or multi-layered cakes requires extra care to ensure stability and even cutting. Begin by placing the cake on a sturdy cake stand or turntable. If the cake has multiple layers, insert dowels or skewers between layers for added support. Use a long, serrated knife to cut through all layers simultaneously, starting from the bottom and slicing upward. Apply gentle, consistent pressure to avoid uneven cuts. For tall cakes, cut in a radial pattern, rotating the stand as you go. Use a serving spatula to carefully remove each portion, ensuring each slice includes all layers. This method ensures even distribution and prevents the cake from toppling or breaking apart during serving.

Serving and Presentation Tips
Arrange slices neatly on a serving plate, garnish with fresh fruit or edible flowers, and store leftovers in an airtight container to maintain freshness.
7.1. Arranging Slices on a Serving Plate
Arrange cake slices neatly on a serving plate for an appealing presentation. Place slices in a fan-like pattern or in a single layer to avoid overcrowding. Use a serving spatula to transfer slices gently, ensuring they remain intact. For visual appeal, leave space between slices and consider garnishing with fresh fruit, chocolate shavings, or edible flowers. This adds color and elegance to the display. Additionally, offer dipping options like chocolate sauce or whipped cream on the side for added flavor. For tall or multi-layered cakes, place them on a tiered stand to showcase their height. Always ensure the plate is clean and free of crumbs for a polished look. Proper arrangement enhances both aesthetics and convenience for guests.
7.2. Garnishing Individual Portions
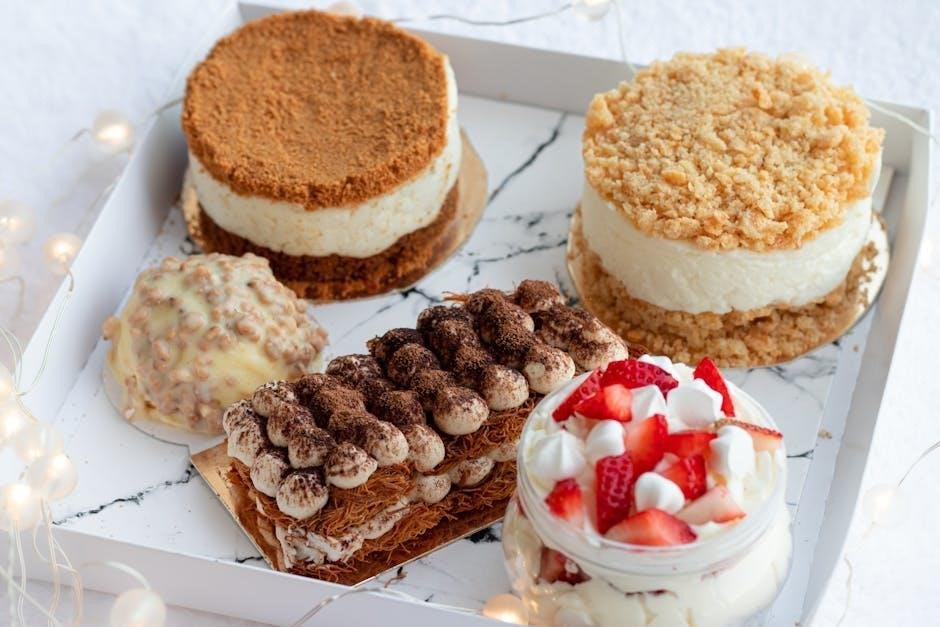
Garnishing individual cake slices enhances their visual appeal and personalizes each serving. Fresh fruits like strawberries, raspberries, or blueberries make vibrant and flavorful additions. For chocolate cakes, shaved chocolate or cocoa powder adds a luxurious touch. Edible flowers or sprinkles can add a festive flair, while nuts or coconut flakes provide a satisfying crunch. Drizzle sauces like caramel or chocolate glaze over the slice for added elegance. Use a small dollop of whipped cream or a sprinkle of powdered sugar for simplicity. Ensure garnishes complement the cake’s flavor profile and are applied lightly to avoid overwhelming the dessert. This attention to detail elevates the presentation and makes each portion feel special, perfect for celebrations or special occasions.
7.3. Storing Leftover Cake Properly
Properly storing leftover cake is essential to maintain its freshness and texture. After cutting, place the cake in an airtight container or wrap it tightly in plastic wrap or aluminum foil. Store it in the refrigerator at a consistent temperature below 40°F (4°C) to prevent bacterial growth. For longer storage, consider freezing the cake. Wrap it securely in plastic wrap or aluminum foil and place it in a freezer-safe bag. Label and date the container for easy identification. When ready to serve, thaw frozen slices in the refrigerator or at room temperature. Avoid leaving the cake at room temperature for extended periods, as it can attract pests or become stale. Proper storage ensures your cake remains delicious for days to come.
Safety and Hygiene Practices
Ensuring safety and hygiene when cutting a round cake is crucial for preventing accidents and maintaining cleanliness. Always handle sharp tools with care, and sanitize all utensils before use. Wash hands thoroughly before and after cutting, and consider wearing gloves to prevent cross-contamination. Keep the workspace clean and dry to avoid slips. Proper hygiene practices ensure a safe and enjoyable experience for everyone involved in cutting and serving the cake.
8.1. Handling Sharp Objects Safely
Handling sharp objects like knives and cake slicers requires attention to safety to avoid accidents. Always store sharp tools in a secure place, out of reach of children. Use a cutting board to prevent slipping and ensure a stable surface. Keep fingers away from the blade and maintain a firm grip on the knife. Avoid distractions while cutting, and never cut toward your body. Regularly inspect tools for damage and replace them if necessary; When passing a sharp object, handle it by the handle and inform the recipient. Supervise children when sharp tools are in use. Proper handling ensures a safe and injury-free cake-cutting experience.
8.2. Preventing Cross-Contamination
Preventing cross-contamination is essential to maintain hygiene and food safety while cutting a round cake. Always wash your hands thoroughly with soap and warm water before handling the cake or tools. Ensure all utensils, such as knives and spatulas, are clean and sanitized. Use separate cutting boards for raw ingredients and the finished cake to avoid transferring bacteria. Cover the cake with plastic wrap or a clean cloth when not in use to protect it from dust and pests. Store leftovers in an airtight container and refrigerate promptly to prevent spoilage. Regularly clean and sanitize the serving area to ensure a clean environment for cutting and serving. Proper hygiene practices safeguard the cake’s quality and ensure a safe dining experience for everyone.
Common Mistakes to Avoid
Common mistakes include cutting too quickly, applying too much pressure, using improper tools, and slicing before the cake is fully set, leading to uneven portions and structural issues.
9.1. Cutting Too Quickly or Applying Too Much Pressure
Cutting too quickly or applying excessive pressure can lead to uneven slices and a messy appearance. A rushed cut may cause the knife to slip, damaging the cake or its decorations. Additionally, too much pressure can compress the cake layers, pushing out fillings or causing the cake to break. This mistake is especially common with tall or multi-layered cakes, where stability is crucial. To avoid this, use a serrated knife and apply gentle, steady pressure, allowing the knife to glide smoothly through the cake. This ensures clean, even cuts and preserves the cake’s structure and appearance. Patience and gentle handling are key to achieving professional-looking results.
- Use a serrated knife for smooth, controlled cuts.
- Apply gentle, consistent pressure to avoid compressing the cake.
- Take your time to ensure even, precise slices.
9.2. Not Using the Right Tools
Using improper tools can lead to uneven cuts, crumbling, and a poorly presented cake. A dull knife, for instance, can tear the cake instead of slicing it cleanly, while a non-serrated knife may not glide smoothly through the layers. Similarly, skipping a cake stand or cutting guide can result in wobbly cuts and uneven portions. Essential tools like a serrated knife, serving spatula, and cake stand are designed to ensure precision and stability. Neglecting these tools can make the cutting process frustrating and yield unprofessional results. Always gather the necessary tools beforehand to achieve clean, consistent slices and maintain the cake’s integrity.
- Invest in a quality serrated knife for smooth cutting.
- Use a cake stand or turntable for stability and accessibility.
- Employ a serving spatula to carefully remove and transfer slices.
9.3. Cutting Before the Cake is Completely Set
Cutting a round cake before it has fully set is a common mistake that can ruin its appearance and structure. If the cake is still warm or the frosting hasn’t hardened, it may crumble or tear when sliced. This is especially true for multi-layered cakes, where layers can shift or collapse under pressure. Allowing the cake to cool and set completely ensures it holds its shape and allows for clean, even cuts; Patience is key—rushing this step can lead to messy results. Always wait until the cake is at room temperature and the frosting is firm before cutting. This ensures a professional finish and prevents unnecessary waste.
- Let the cake cool completely to avoid crumbling.
- Ensure frosting is set for a clean, stable surface.
- Be patient, as rushing leads to uneven cuts.
Mastering round cake cutting requires patience, the right tools, and precise techniques. With practice, you’ll achieve clean slices and professional presentation, ensuring every celebration is memorable.
10.1. Summary of Key Tips
Effective round cake cutting starts with proper preparation, such as cooling the cake completely and applying a crumb coat. Using a serrated knife and cake stand ensures stability. Leveling the cake beforehand guarantees even slices. For precision, use a cutting guide or template to measure portions accurately. Apply gentle, steady pressure when cutting to avoid crumbling. For tall or multi-layered cakes, cut one layer at a time. Serving slices on a clean plate and garnishing with fresh toppings enhances presentation. Always store leftovers in an airtight container to maintain freshness. By following these steps, you’ll achieve professional-looking results and enjoy perfectly portioned slices every time.
10.2. Final Thoughts on Mastering Round Cake Cutting
Mastering round cake cutting is a skill that combines patience, practice, and the right tools. By following the steps outlined, from preparation to presentation, you can achieve clean, even slices every time. Remember, precision and creativity go hand in hand, allowing you to serve beautifully portioned desserts. Whether for a celebration or a simple gathering, perfectly cut cake enhances the overall experience. Don’t be discouraged by initial mistakes; they’re part of the learning process. With time and attention to detail, you’ll become a pro at cutting round cakes. Keep experimenting, and enjoy the satisfaction of delivering impeccable results to your guests. Happy cutting!